Cleaners
- Sal Suds
- Dawn
- Krud Kutter Degreaser
- Bar Keepers Friend powder cleanser
- Dishwasher cleaner (Xcleen Dishwasher cleaner)
- Grout-EEZ cleaning product
- Easy Off No Fumes Oven cleaner
- Terry Cleaning cloths
- Microfiber cloths
- Paper towels
Tools
- Scrub brush
- Squeegee with nylon sponge pad
- Scrub Daddy Damp Duster
- Eraser Daddy
- Toilet brush
- Cleaning toothbrush
- Scrub Mommy sponge
- SOS pads
- Razor scraper
- Swiffer Duster 360
- Swiffer Duster 6 ft Extender
Containers
- Spray bottle with all-purpose cleaner
Equipment
- Steam mop
- Vacuum with brush attachment
Personal Protective Equipment
- Face Mask
- Safety Glasses
- Bib Apron
- Gloves
KITCHEN
IMPORTANT: If Inside Oven is ordered, do this 1st. Spray Easy-Off all around inside oven and inside door first. Close door. Come back to this after 2 hours. Wipe clean with a wet sponge, cloth or paper towel.
SUPPLIES NEEDED:
- Duster
- All-Purpose Cleaner
- Microfiber cloth
- Gloves
STEPS:
- Dust cobwebs and lights
- Hand-wipe hanging lights if reachable. Do NOT wipe bulbs.
SUPPLIES NEEDED:
- All-Purpose Cleaner
- Sponge or Soft Cloth
- Gloves
STEPS:
- Remove all food and shelves from refrigerator
- Wipe down the inside of the fridge with an all-purpose cleaner and sponge or cloth
- Clean the shelves and drawers with an all-purpose cleaner and sponge or cloth
SUPPLIES NEEDED:
- All-Purpose Cleaner
- Sponge or Soft Cloth
- Gloves
STEPS:
- Remove all food and shelves from freezer
- Wipe down the inside of the freezer with an all-purpose cleaner and sponge or cloth
- Clean the shelves and drawers with an all-purpose cleaner and sponge or cloth
SUPPLIES NEEDED:
- Oven Cleaner
- SOS Pads
- Sponge or Terry Cloths
- Paper Towels
- Gloves
- Face Mask
- Safety Glasses
- Bib Apron
STEPS:
- Put on your PPE:
- Gloves
- Face Mask
- Safety Glasses
- Bib Apron
- Remove the oven racks and clean them with SOS pads
- Apply oven cleaner to the inside of the oven and let it sit for the recommended time on the label
- Wipe the gunk off the ceiling, walls, and floor of the oven with a paper towel and discard
- Scrub the insides of the oven with wet SOS pads to remove any remaining residue
- Rinse the oven. Remove all the soap and oven cleaner residue with a wet sponge or damp terry cloth
- Wipe down the inside of the freezer with an all-purpose cleaner and sponge or damp terry cloth
SUPPLIES NEEDED:
- All-Purpose Cleaner
- Dawn Dish Soap
- Sponge or Soft Cloth
- Paper towel
- Toothbrush
- Gloves
- Face Mask when cleaning range hood
- Apron (to protect clothing from oven cleaner or grease)
STEPS:
- Put on your PPE:
- Gloves
- Face Mask
- Safety Glasses
- Bib Apron
- Remove the filters and soak them in warm, soapy water
- Clean the interior and exterior of the hood. Use a damp cloth and Dawn to wipe the interior and exterior of the range hood
- Clean the nooks and crannies. Use a toothbrush or a small brush to clean the crevices, edges, and corners of the range hood
- Rinse the filters in warm water and let them air dry before putting them in the range hood
- Dry range hood. Wipe down the exterior of the range hood with a dry cloth or paper towel
SUPPLIES NEEDED:
- All-Purpose Cleaner
- Bar Keepers Friend
- Sponge or Soft Cloth
- Paper towel
- Plastic scraper
- Gloves
STEPS:
- Put on your PPE:
- Gloves
- Remove any grates or burner caps from the stove
- Wipe down the stove with an all-purpose cleaner and sponge or cloth.
- Remove any stubborn stains or grease with Bar Keepers Friend and a plastic scraper
- Clean the grates and burner caps with an all-purpose cleaner and sponge or cloth
SUPPLIES NEEDED:
- All-Purpose Cleaner
- Sponge or Soft Cloth
- Microwave safe bowl
- Dawn Dish Soap
- Toothbrush (cleaning brush)
- Gloves
STEPS:
- Put on your PPE:
- Gloves
- Steam the microwave. Fill a microwave-safe bowl with water. Turn on for 2-3 minutes create steam.
- Wipe down the inside of the microwave with an all-purpose cleaner and sponge or cloth.
- Remove the turntable and the turntable support and wash them in warm, soapy water.
- Clean the nooks and crannies. Use a tooth brush to clean the crevices, edges, and corners of the microwave.
- Wipe down the door seal and the control panel
- Return the turntable and support. Put the turntable and the turntable support back in the microwave.
- Wipe down the exterior of the microwave with All-Purpose cleaner and cloth
SUPPLIES NEEDED:
- Dishwasher cleaner
- Sponge or Soft Cloth
- Toothbrush
- Gloves
STEPS:
- Put on your PPE:
- Gloves
- Empty dishwasher of dishes
- Remove removable parts like racks and utensil holders
- Clean nooks and crannies with a toothbrush. Clean crevices, edges, and corners.
- Apply dishwasher cleaner to the inside of the dishwasher and let it set for recommended time on the label or run a cycle if using pods
- Wipe the door and seals. Use a damp cloth to wipe the door seals and the control panel.
- Put racks back in the dishwasher
- Wipe the dishwasher clean. Use a damp cloth and mild detergent to wipe interior and exterior of dishwasher
- Polish if stainless steel. Wipe with grain to make it shine.
SUPPLIES NEEDED:
- All-purpose cleaner
- Bar Keepers Friend
- Microfiber cloth or sponge
- Scrub brush or toothbrush
- Gloves
STEPS:
- Put on your PPE:
- Gloves
- Clean the inside of the cabinets and drawers. Using an all-purpose cleaner, wipe down the inside of the cabinets and drawers with a microfiber cloth or sponge.
- Remove stains. For tougher stains or grime, use BKF and water to make a paste and apply it with a scrub brush or toothbrush.
- Remove the turntable and the turntable support and wash them in warm, soapy water.
- Rinse the cabinets and drawers with a damp cloth and dry with a clean towel.
- Clean the outside of the cabinets and drawers. Wipe down the exterior of the cabinets and drawers with an all-purpose cleaner or a mixture of water and vinegar using a microfiber cloth or sponge.
SUPPLIES NEEDED:
- All-purpose cleaner
- Microfiber cloth
- Gloves
STEPS:
- Full Wipe Clean Countertops and Backsplashes
SUPPLIES NEEDED:
- All-purpose cleaner
- Bar Keepers Friend
- Sponge
- Microfiber cloth
- Gloves
STEPS:
- Around the base of faucets, use cleaner and edge of sponge
- Where sink and counter meet (around the sink and above the sink basin), use cleaner and sponge
- Sink basin/bowl, sprinkle a little Bar Keeper’s Friend (just a little!), spread around bowl with sponge and rinse
- Buff Sink Faucets with dry microfiber cloth
BATHROOMS
SUPPLIES NEEDED:
- All-purpose cleaner
- Bar Keepers Friend
- Toilet Brush
- Paper Towels
- Gloves
STEPS:
- Apply Bar Keeprs Friend Powdered Cleanser in the toilet. Using a toilet brush, brush the toilet around the ring line, in the drain of a toilet and up under the toilet bowl rim. Leave the BKF in the toilet to let it work its magic for 2 minutes.
- Clean the outside of the toilet. Whilst the cleaner is working, clean the outside of the toilet with all-purpose cleaner and a paper towel including:
- the handle
- the lid
- the tank outside
- the lid of the toilet seat
- the toilet seat
- under the toilet seat
- the rim
- the outside of the bowl
- base of the toilet
- behind the toilet
- the pipes connecting water to the toilet
- Clean the floor and baseboards around the base of the toilet with all-purpose cleaner and paper towel
- Clean the inside of the toilet bowl. Use a toilet brush to clean the ring, the drain and up under the rim of the toilet.
SUPPLIES NEEDED:
- All-purpose cleaner
- Bar Keepers Friend
- Scrub Mommy or Non-scratch Scrub Sponge
- Microfiber Cloths
- Gloves
STEPS:
- Remove any items from around the sink and wipe down the counter with all-purpose cleaner and a cloth
- Scrub the inside of the sink. Use the wet non-scratch scrub sponge with BKF to scrub inside of sink, including the drain
- Rinse the sink with water to remove any debris
- Wipe down the faucet, handles, and any other fixtures with all-purpose cleaner and a microfiber cloth
- Wipe down all the items on the vanity. These are lotions, makeup, hairspray, deodorants and anything left on the counter such as cotton ball or makeup remover containers. After wiping down with a damp cloth, arrange them nicely on the back of the vanity.
SUPPLIES NEEDED:
- Water
- Microfiber Cloths
- Gloves
STEPS:
- Wet the mirror with a damp microfiber cloth and work in a Z pattern so you don’t go back over any area you’ve cleaned
- Dry the mirror using a dry microfiber cloth in the other hand. Dry the mirror in a Z pattern so you don’t go back over any area you’ve already dried.
- Inspect your work from every angle to make sure there are no streaks and nothing was skipped.
SUPPLIES NEEDED:
- All-purpose cleaner
- Microfiber Cloth or sponge
- Warm water
- Gloves
STEPS:
- Wet your cloth or sponge in warm water from sink and wring out excess water. You can also use all-purpose cleaner if necessary to loosen dried toothpaste, hairspray or other residue.
- Wipe down the cabinets. Clean both the inside and outside of the cabinet with the cloth, paying extra attention to any areas with built-up grime or grease.
- Rinse the cloth frequently and change the cleaning solution if it becomes dirty.
- Dry the cabinet. Once the cabinet is clean, wipe it down with a dry microfiber cloth.
- Repeat steps for medicine cabinet
SUPPLIES NEEDED:
- Degreaser such as Krud Kutter
- Non-scratch sponge
- Bar Keepers Friend powder
- Eraser Daddy
- Microfiber cloths
- Scrub Brush or Drill Bit Brush
- Squeegee with Nylon scrub brush
- Gloves
STEPS:
- Put on gloves.
- Remove items from shower/tub area. This includes shampoos, soaps, razors, cloths, sponges, pumice stones.
- Apply a degreaser (Krud Krutter in full strength) to the shower / tub and glass surfaces and let it sit for a few minutes. This will cut through the body proteins, soap scum and hair dyes in the tub or shower.
- Clean the tile and grout. Use the scrub brush or the electric drill and brush to clean the the grout and tile with built-up soap scum or mildew. Avoid using the drill brush on glass. The glass will need to be scrubbed by hand with a non-scratch scrub sponge.
- Rinse the shower/tub and shower glass with water to remove any cleaner residue.
- Use a squeegee on walls, doors and microfiber cloth to dry the surfaces
- Use Eraser Daddy on tough stains from tub, sink, and toilet. They work great on soap scum and hard water stains. Just remember to use wet!
SUPPLIES NEEDED:
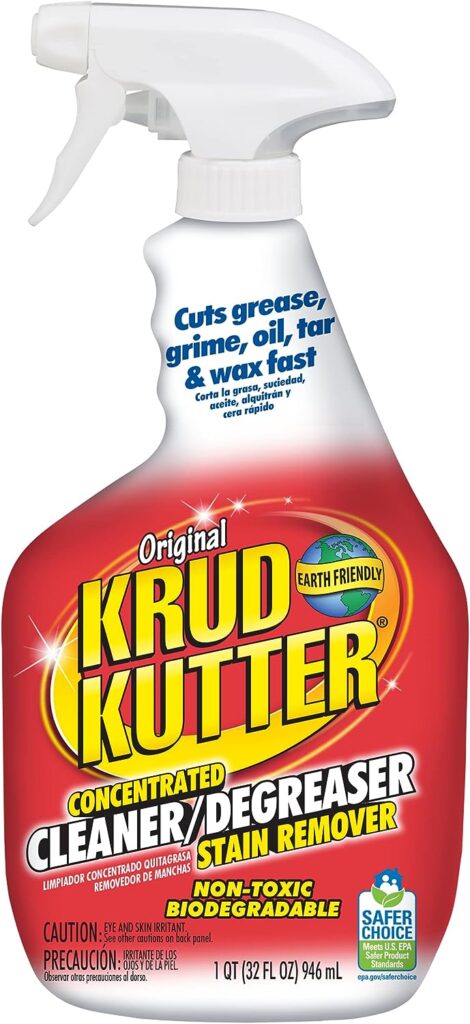
- Krud Kutter Degreaser
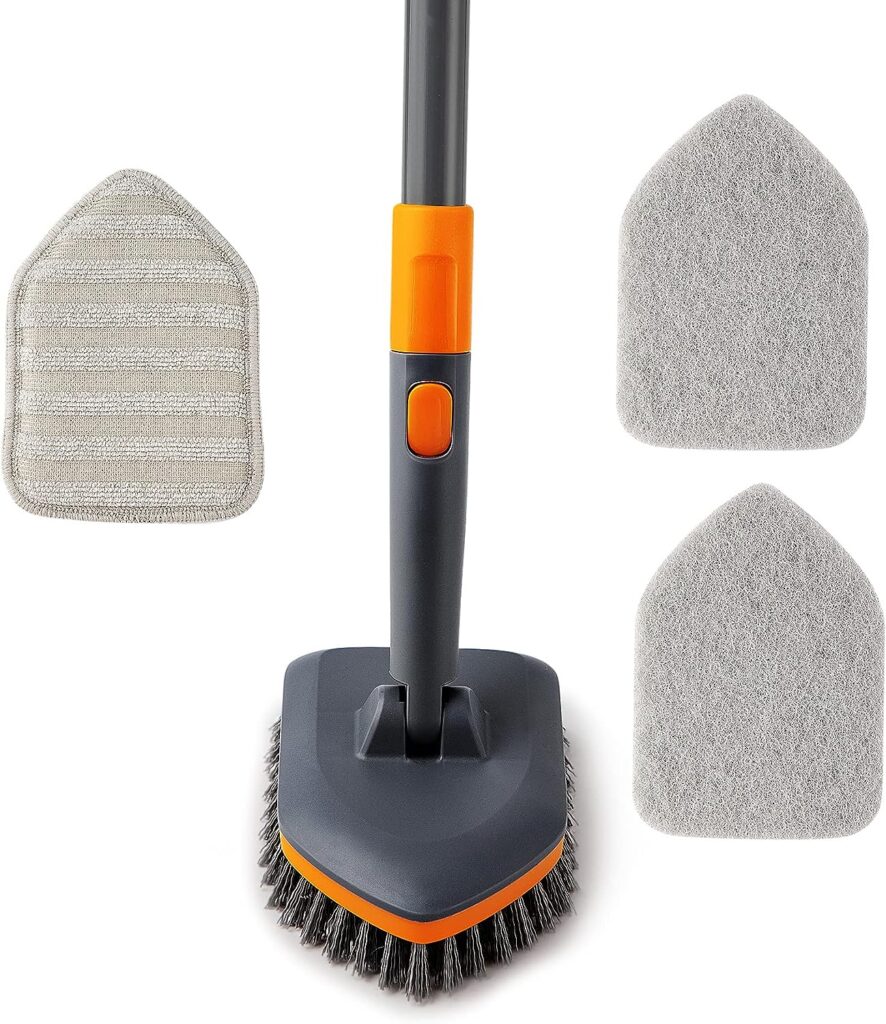
- Non-scratch Scrub Brush
RECOMMENDED: CLEANHOME Tile Tub Scrubber Brush
- Non-scratch sponge
- Squeegee
- Gloves
STEPS:
- Put on gloves.
- Apply a degreaser (Krud Krutter in full strength) to the glass surfaces and let it sit for a few minutes. This will cut through the body proteins, soap scum and hair dyes in the tub or shower.
- Scrub glass with non-scratch brush or sponge.
- Rinse the shower/tub and shower glass with water to remove any cleaner residue.
- Use a squeegee on doors and microfiber cloth to dry the surfaces
- Use Eraser Daddy on tough stains if needed. They work great on soap scum and hard water stains. Just remember to use wet!
SUPPLIES NEEDED:
- Handheld steamer with grout cleaning attachments (Light ‘n’ Easy Steam mop)
- Grout-EEZ cleaning product
- Water (tap is fine)
- Cleaning brush or Drill Bit Brush
- Terry Cleaning cloth
- Gloves
- Safety glasses
- Mask
STEPS:
- Put on PPE:
- Gloves
- Safety glasses
- Mask to protect yourself from hot steam and splashing from drill bit brush if using electric drill
- Apply Grout-EEZ cleaning product to the grout lines, following the manufacturer’s instructions for dwell time (how long the product sits on the grout).
- Apply a degreaser (Krud Krutter in full strength) to the shower / tub and glass surfaces and let it sit for a few minutes. This will cut through the body proteins, soap scum and hair dyes in the tub or shower.
- Fill the handheld steamer’s water tank with water according to the manufacturer’s instructions.
- Attach the grout cleaning attachment to the handheld steamer.
- Plug in and turn on handheld steamer and wait for it to heat up.
- Clean the grout. Hold the grout cleaning attachment brush against the grout line, applying steam directly to the area. Move the steam tip along the grout line as you gently scrub the grout to remove dirt and grime, working in small sections.
- Wipe up gunk from grout. Use a cleaning cloth to wipe away any excess cleaning solution and dirt that’s been lifted from the grout line.
- Repeat this process on all of the grout lines in the bathroom.
- Wipe down the entire bathroom floor with a cleaning cloth to remove any remaining cleaning solution or dirt before steaming the floor to clean it.
- Clean your attachments. Once you’re finished cleaning the grout, unplug the steamer. Clean the handheld steamer and grout cleaning attachment (Usually the steamer attachments are dishwasher safe and can be added to the cutlery holder in the dishwasher during your next cycle.)
SUPPLIES NEEDED:
- Steam mop (Light ‘n’ Easy Steam mop)
- Water (tap is fine)
- Microfiber mop pads
- Gloves
STEPS:
- Put on gloves.
- Prepare your mop. Begin by preparing your steam mop. Fill the water tank with water, making sure not to overfill it. For this project we will only use water to clean and sanitize the floors.
- Attach a microfiber pad to the bottom of the mop. Make sure the mop pad is securely attached.
- Plug in the steam mop and wait for it to heat up. This usually takes 30 – 60 seconds.
- Begin by steam cleaning the corners and edges of the bathroom floor. Use the corners of the steam mop’s head to get into tight spaces and corners of the room.
- Work in small sections. Move the steam mop across the bathroom floor in small sections, using a back-and-forth motion. Make sure to overlap each pass slightly to ensure that you clean the entire surface.
- Double back. It there are any dirty or stained areas, spend some extra time on them to make sure they’re thoroughly cleaned.
- Unplug and empty the steamer. When you’re finished steam cleaning the entire bathroom floor, turn off the steam mop and unplug it.
- Remove the mop pad. Remove the microfiber mop pad from the bottom of the steam mop. In most cases these mop pads are machine washable. If the mop pad is particularly dirty, you can soak it on a gallon of water with 1/4 cup of OxiClean to remove the stains.
- Empty the steamer. Empty any remaining water from the steam mop’s water tank and allow it to cool completely before storing it away. NOTE: Store it with the water reservoir door open to let the steamer air out without harboring any bacteria.
LIVING AREAS AND CLOSETS
SUPPLIES NEEDED:
- Vacuum
- All-purpose cleaner (like Sal Suds)
- Water
- Microfiber cloths
- Swiffer Duster 360
- Swiffer Duster 6 ft Extender
- Gloves
STEPS:
- Clutter should be cleared. This is Customer’s job!
- Put on gloves.
- Dust sufaces. Starting at top of room, use Swiffer Duster 360 to dush all surfaces including:
- shelves
- mantels
- windowsills
- picture frames
- ceiling fans (Swiffer Duster 6 ft Extender)
- corners of rooms where cobwebs hide (Swiffer Duster 6 ft Extender)
- around lights (Swiffer Duster 6 ft Extender)
- baseboards (Swiffer Duster 6 ft Extender)
- Under sofas, chairs, behind sofas and other hard to reach areas (Swiffer Duster 6 ft Extender)
- Clean surfaces. Use an all-purpose cleaner and a clean damp cloth to wipe down all surfaces.
- Vacuum Floors. Using a vacuum with attachments, vacuum all floors and carpets in the room. Use crevice tool to clean hard-to-reach areas, such as corners, and around the seam of the carpet where the wall meets the floor, and under the furniture
- Clean upholstery. Use upholstery attachment.
NOTE: The ONLY windows you will clean are those of the front and back door and sliding doors. Do NOT clean other windows! Customer needs to use a professional window cleaning company.
SUPPLIES NEEDED:
- Damp microfiber cloth
- Dry microfiber cloth
- Paper towels (for window tracks)
- All-purpose cleaner
- Toothbrush
- Vacuum with brush attachment
- Gloves
STEPS:
- Put on gloves.
- SLIDING GLASS DOORS: Vacuum the window tracks using the hose attachment. Spray the window tracks with all-purpose cleaner and wipe with paper towels.
- SLIDING GLASS DOORS, FRONT AND BACK DOOR WINDOW: Wipe the windows with damp microfiber cloth
- Dry the windows with dry microfiber cloth
NOTE: We don’t clean mini-blinds. Recommend a blind company.
SUPPLIES NEEDED:
- Swiffer Duster 360
- Microfiber cloth
- Paper towels (for window tracks)
- All-purpose cleaner
- Toothbrush
- Gloves
STEPS:
- Put on gloves
- Close the blinds and use a Swiffer Duster to dust them off. You can also use a vacuum with a brush attachment to remove any dust or debris.
- Wipe the blinds if icky. If the blinds are sticky with grease, nicotine tar or gunk, use a damp terry cloth and Krud Kutter Original Degreaser / Cleaner to hand wipe down both sides each slat of each blind.
- Use a clean microfiber cloth to dry off the blinds.
- Repeat the process for all blinds in the home.
SUPPLIES NEEDED:
- Duster
- Microfiber cloth
- All-purpose cleaner
- Gloves
STEPS:
- Put on gloves
- Dust baseboards with Duster
- Wipe baseboards that need it with damp cloth. Spray cleaner and wipe with cloth for those baseboards that need it.
SUPPLIES NEEDED:
- Microfiber cloth
- Cleaner
- Gloves
STEPS:
- Put on gloves
- Clean the following miscellaneous areas:
- Light switches
- Electrical outlets
- Air vents
- Closet shelves and rods
SUPPLIES NEEDED:
- Vacuum
- Mop
- Sal suds
- Gloves
STEPS:
- Put on gloves
- Vacuum carpets and hard floors
- Mop hard floors with water and Sal Suds – small drop of Sal Suds in cartridge of water that comes with mop
QUALITY CONTROL CHECK
- Open your app’s checklist and make sure all items are marked off when applicable
- This is important! Customer will see this!
- TAKE PICS OF YOUR WORK!
- Take pics of every room: